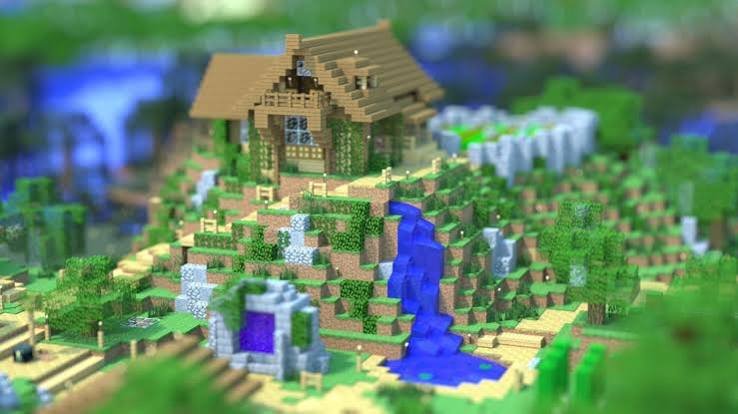
Step 1: Download and Initial Configuration
To begin, visit the official Chunky website to download the installer. The software is open-source, entirely free of hidden ads, and fully supported on Windows, Mac, and Linux.
Once installed, launch the application. During the initial setup, Chunky will prompt you with a few quick questions:
- File Storage: Keep the default directory option for data storage; it works perfectly.
- Version: Naturally, select the latest available version.
- Minecraft Path: Chunky is smart and automatically detects your default game directory.
- RAM Allocation: Do not be overly generous here! Even when rendering a massive kingdom, Chunky rarely exceeds 3 GB of RAM. Allocating between 4 GB and 8 GB is more than enough to speed up calculations without straining your system.
Step 2: Loading Your Map and Selecting Chunks
As soon as you launch the main program, Chunky will ask you to load a Minecraft world save. Select your world, and the software will display a clean, top-down 2D view of your map .
- Navigating: Hold down the left-click button and drag your mouse to move across the map.
- Selecting: A simple left-click highlights a specific chunk (16x16 block area).
- Pro Tip: Hold down Shift + Left-click and drag your mouse to highlight a massive region or a large building structure in a matter of seconds.
Optional: If you want to use a custom look, go to the Options menu to load a texture pack. Keep in mind that Chunky strictly requires the resource pack to be a compressed .zip file, not an extracted folder.
Once your desired area is highlighted in yellow, click New Scene. The beauty of this feature is that Chunky saves your exact bounds and environment adjustments so you can reload and tweak the project whenever you want.
Step 3: Frame Your Shot Like a Cinematographer
A dedicated render preview window will open. (If it does not appear initially, hide the preview window and click to show it again to force a UI refresh).
- Test Resolution: Under the general settings, leave the image size at 400x400 pixels .Conducting framing and lighting checks on a tiny image saves an immense amount of time . We will upscale to Full HD only when ready for the final render.
- Camera Controls: Use a left-click and drag in the preview window to rotate your field of vision. Use the arrow keys on your keyboard to slide forward, backward, left, or right. Bonus: Hold down the K key to fly through the map much faster.
- Perspective Presets: Under the Camera tab, you have access to excellent view presets:
- Isometric View: A classic 45° overhead sky perspective that gives your builds an incredible miniature model look. In this mode, the mouse scroll wheel acts purely as a zoom tool.
- Parallel View: By selecting a side angle (like the "Left" or "Right" presets), you get a completely flat 2D profile view. This is fantastic for cross-sections of buildings or a retro Terraria-like aesthetic !
- Camera to Player: If you position your character in-game exactly where you want the snapshot to be taken before loading the map, this button instantly snaps the Chunky camera to your player's exact perspective.
Step 4: Mastering Atmospherics and Lighting
This is where your render comes to life. You can hit Start to run a continuous live render test, play with the sliders, and click Reset to pause it while tweaking options.
- Custom Sun Path: Unlike regular Minecraft where the sun tracks strictly from East to West, Chunky allows you to place the sun absolutely anywhere—even in the North. Lower the sun's altitude slider to create breathtaking golden hour sunset angles, pump up the intensity, or warm up the solar color palette.
- The Sky: Transition from a basic gradient background to a realistic simulated sky. You can also import a custom Skymap (panoramic background images easily found online) for an incredibly dramatic horizon.
- Volumetric Fog: You can enable a fog slider to inject serious mood into your landscape. Be warned: use the absolute minimum value. Chunky fog builds up rapidly, and too much will swallow your architecture in a blurry white cloud !
- Water Translucency: Adjust depth visibility and water opacity. This is perfect if you want to showcase complex reef designs, shipwrecks, or an underwater base.
- Depth of Field (DoF): Want a high-end photography look? Move your camera up close to an object (like a crafting table), hit Autofocus to lock onto the center of the frame, and pull the slider to blur out the background. This produces an authentic, professional "Tilt-Shift" miniature effect.
Step 5: Cooking the Final Image
Is the framing set up perfectly? Is your lighting worthy of a movie poster? It is time to run the final calculations.
- Manage Your CPU: 3D ray tracing will push your processor to a heavy 100% capacity. If you want to watch videos or browse the web while Chunky works, head over to the Advanced tab and cap the render thread utilization to 80%. Your computer will stay cool and responsive.
- Upscale Everything: Under the General panel, switch the resolution fields from your tiny test setup to your final dimensions (e.g., Full HD 1920x1080).
- Let it Render: Hit Start. At first, the image will look highly pixelated and grainy—especially across water surfaces. This is completely normal for path-traced rendering. As the calculation passes pile up, the engine cleans the "noise" out of the image. A clean, high-resolution scene will easily take 20 to 30 minutes depending on your CPU .
- Save Your Art: Chunky automatically saves a backup frame to your directory every 500 passes. Whenever you look at the canvas and feel the noise has cleared into a pristine, crystal-clear picture, hit the manual Save button and admire your masterpiece !