WorldEdit is a plugin that allows you to do a lot of things to build and terraform much faster. It is a plugin that you can use directly in-game via commands.
How the plugin works
Now, let's get to the heart of the matter. I will try to be as clear as possible while keeping this tutorial complete. To get started:
I/ Selection
This is THE essential skill to master in WorldEdit. If you can't manage this, there is not much else I can do for you!
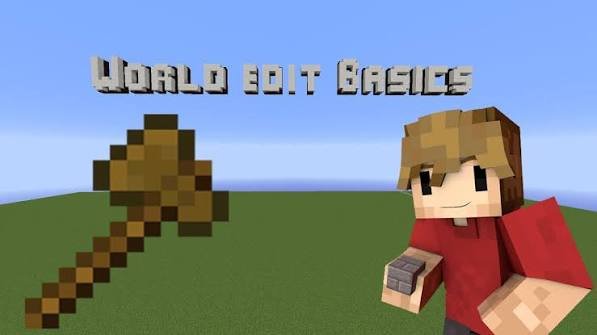
It consists of defining a rectangular cuboid—or a sort of cube, if you prefer. To do this, equip yourself with a wooden axe. If you are feeling lazy, type
It consists of defining a rectangular cuboid—or a sort of cube, if you prefer. To do this, equip yourself with a wooden axe. If you are feeling lazy, type
//wand to give yourself the axe automatically. Now, simply left-click on a block somewhere and right-click on another block somewhere else. The plugin will then consider these two points as the opposite corners of the cube, and this will be your selection!II/ Selection Modification Commands
1) //set
This is by far the simplest command and the first one you will use. It is used to fill the selected area with the block of your choice:
By the way, if you don't want to use IDs because they are hard to remember, you can just use English words:
This is by far the simplest command and the first one you will use. It is used to fill the selected area with the block of your choice:
//set <block id or name>By the way, if you don't want to use IDs because they are hard to remember, you can just use English words:
//set stone will have the exact same effect as //set 12) //walls
If you know a bit of English, you have probably already guessed how this works. This command places your chosen block ONLY on the edges of your selection. Imagine a room: you have the roof, the floor, and the walls. Well, this command only builds the walls.
Usage:
If you know a bit of English, you have probably already guessed how this works. This command places your chosen block ONLY on the edges of your selection. Imagine a room: you have the roof, the floor, and the walls. Well, this command only builds the walls.
Usage:
//walls <id or name>3) //outline
This is exactly the same as the previous command, except it also includes the roof and the floor.
Usage:
This is exactly the same as the previous command, except it also includes the roof and the floor.
Usage:
//outline <id or name>4) //replace
This command has two possible uses:
Replaces all existing blocks except air blocks with the specified block.
Replaces all blocks of a specific type with another type of block:
Now you know the most important ones for this section, but for those who are curious:
This command has two possible uses:
//replace <id or name>Replaces all existing blocks except air blocks with the specified block.
//replace <from-id or name> <to-id or name>Replaces all blocks of a specific type with another type of block:
//replace stone grass will replace all stone blocks with grass blocks.Now you know the most important ones for this section, but for those who are curious:
5) //overlay
Covers all the blocks in the selection with another layer of blocks.
Usage:
Covers all the blocks in the selection with another layer of blocks.
Usage:
//overlay <id or name>6) //hollow
This command hollows out the inside of a volume, leaving just the outer shell.
Usage:
This command hollows out the inside of a volume, leaving just the outer shell.
Usage:
//hollow <name or id>III/ Copy and Duplication Commands
1) //copy, //cut and //paste
Vital! This command copies all the blocks in your selection, and you just need to type
Usage:
The
Vital! This command copies all the blocks in your selection, and you just need to type
//paste to place them. Be careful how you paste, though! Indeed, if you try this, you will see in the chat: "Pasted relative to you. Undo with //undo". The //paste command is actually calculated from the exact position where you stood when you typed //copy. If you select a house and type //copy while standing right in front of the door, when you type //paste, the door of the house will appear right in front of you (along with the rest of the house, if your selection was correct!).Usage:
//copy -> //pasteThe
//cut command works just like copy, but it deletes the original build.2) //rotate
Because if you haven't tried the command yet,
So, this command allows you to rotate the copied structure by 90-degree increments.
Usage:
As if it wasn't complicated enough, your copy position also rotates with the selection. If you rotate your house and type
Because if you haven't tried the command yet,
//paste only pastes relative to your X, Y, and Z coordinates, not your orientation!So, this command allows you to rotate the copied structure by 90-degree increments.
Usage:
//copy -> //rotate <angle (in increments of 90)> -> //pasteAs if it wasn't complicated enough, your copy position also rotates with the selection. If you rotate your house and type
//paste, the door of the house will still appear right in front of you.3) //flip
After rotation, here comes symmetry! The
Usage:
Note that if you simply run the command while looking in the right direction, you don't need to specify the cardinal point.
After rotation, here comes symmetry! The
//flip command allows you to mirror your selection along a specific axis.Usage:
//flip [direction (north, south, etc.)]Note that if you simply run the command while looking in the right direction, you don't need to specify the cardinal point.
4) //move
Nothing too complicated here. If you type
Usage:
Nothing too complicated here. If you type
//move <number> while looking in a direction, the contents of your selection will move by the specified number of blocks in that direction.Usage:
//move <number> [direction]5) //stack
This command is very practical for pattern lovers: it allows you to repeat a pattern a certain number of times in the direction you are looking.
Usage:
This command is very practical for pattern lovers: it allows you to repeat a pattern a certain number of times in the direction you are looking.
Usage:
//stack <number> [direction]6) Schematics
You know how to copy and paste, but you can do even better: you can transfer a build from one server to another!
After copying the build, type
You know how to copy and paste, but you can do even better: you can transfer a build from one server to another!
After copying the build, type
//schematic save <name>. Then, send a very nice message to your server administrator so they can give you that nice little .schematic file. You can then share it with another server administrator so they can upload it into their server files. Once done, type //schematic load <name> and then //paste. Alternatively, you can just use this to backup your builds against players who are a bit too casual with fireballs. You can view the saved schematics on your server with //schematic list.IV/ Commands That Don't Fit Anywhere Else
1) //naturalize
"Naturalizes" the selection by transforming the top 3 layers of stone into dirt and grass blocks.
"Naturalizes" the selection by transforming the top 3 layers of stone into dirt and grass blocks.
2) //regen
Resets the area to its initial natural state. More precisely, it undoes any blocks placed or broken in the area back to the original world generation.
Resets the area to its initial natural state. More precisely, it undoes any blocks placed or broken in the area back to the original world generation.
3) //undo
If you have been following this tutorial, you already know what this does: it undoes your last WorldEdit action.
If you have been following this tutorial, you already know what this does: it undoes your last WorldEdit action.
4) Shapes
These are very easy to understand, so here they are plain and simple:
These are very easy to understand, so here they are plain and simple:
- Sphere:
//sphere <id or name> <radius> - Cylinder:
//cyl <id or name> <radius> <height>-> Only generates vertical cylinders. - Pyramid:
//pyramid <id or name> <size of one side of the base>
Add an "h" in front of each command to make a hollow shape instead (//hsphere,//hcyl,//hpyramid).
5) //drain
Removes all fluids within the specified block radius. You must be standing inside the fluid itself to remove it. Note: If two lakes are separated by 3 blocks, and you stand in one of them and type
Usage:
Removes all fluids within the specified block radius. You must be standing inside the fluid itself to remove it. Note: If two lakes are separated by 3 blocks, and you stand in one of them and type
//drain 50, only the lake you are standing in will be emptied.Usage:
//drain <radius>6) /snow
Makes it snow within a specified radius. Note: There is indeed only one "/" in this command.
Makes it snow within a specified radius. Note: There is indeed only one "/" in this command.
7) //setbiome
Allows you to change the nature of a biome in the selected area. The visual effect only takes place after logging out and logging back into the game.
Allows you to change the nature of a biome in the selected area. The visual effect only takes place after logging out and logging back into the game.
Thank you for reading! There are many things I haven't covered here, such as masks, as well as walls, outline, overlay, hollow, move, naturalize, cyl, pyramid, and so on. Nevertheless, this is the perfect tutorial to start using WorldEdit.
You can find a selection of builds here.